Saturday, 30 May 2015

Steps to Easily Root Samsung Galaxy S6 SM-G920 and Galaxy S6 Edge SM-G925

What will you need:

  • A Samsung Galaxy S6 SM-G920 or Galaxy S6 Edge SM-G925.
  • PingPong app to root. Download it from here.
  • A bit of patience.
Note: This process is intended only for Samsung Galaxy S6 SM-G920 or Galaxy S6 Edge SM-G925. Do not try this on other devices.

Heads up: Before rooting your device, make a back up of your device.

How to root Samsung Galaxy S6 SM-G920 or Galaxy S6 Edge SM-G925:

  • Download pingpongroot_.apk. Install & open it.
  • It will automatically install SuperSU 2.46 for you. Follow the instructions on screen. You may need to enable unknown source for this step.
  • Once install is finished, click “Open" and run it once to "activate" it. It will prompt an error message (unless you already rooted) and exit automatically, bring you back to PingPong root.
  • Click "Download Data" button to update device data if you have Internet connection.
  • Open it and click "Get Root!" button
  • If prompted for app permissions, allow them and continue. If it reboots, just retry.
  • Once finished, please make sure to reboot.
  • You can uninstall PingPong root app once finished.
Congrats! You have successfully rooted your Samsung Galaxy S6 device.

Disclaimer: Rooting voids your warranty, so do this process at your own risk.


Friday, 29 May 2015

Steps to Install and Run Kali Linux Virtually On Android Device

Installing Kali Linux on Android gives us access to wide range of possibilities. In face, anything we do on pc running Kali Linux can be done remotely / portably on Android. Remember, not all devices are capable of running Kali Linux. The particular device should meet some requirements which I'll be mentioning later in this tutorial. Keep in mind that, after using this guide, we're not going to have Kali Linux as our primary Operating System, but actually it runs virtually in virtual machine, which is same as having secondary OS in VM VirtualBox.


Why Android Device?

The reason one likes to have Kali Linux on their Android devices is portability. Not all can afford laptops or pcs capable of running more than operating system. The other reason is some pcs may not have enough space on hard drive. These are the two main reasons for choosing Android as platform.

Does the Android device needs ROOT?

The answer is yes. This is because the process you are going to perform messes with system files which require super user permissions. Bear in mind that rooting voids phone warranty.

So, What requirements should the device have?

  • The device should have at least 512 MB of Ram. The more Ram, the faster the performance.
  • 4-5 GB of Internal Memory.
  • Android 4.0 and above.

Prerequisites:

  • Android Device
  • Complete Linux Installer (Requires ROOT). Download full version from here.
  • Android VNCViewer. Download full version from here.
  • Android Terminal App. Download full version from here.

Also Read:


The main process starts here:

1. Download Complete Linux Installer and install the app.

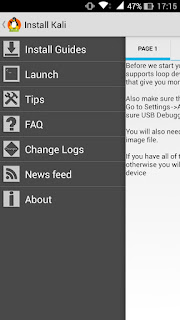
2. Open the application (Allow Super User Permission) and click Install Guides.


3. In the list of Linux Operating systems that can be installed, select Kali Linux.

4. Now scroll to page 2 and click Download Image.


5. In the mean while, when the download is in progress, install the remaining applications 
VNCViewer and Terminal.

6. Once the download has finished you will now need to extract the zip folder using file manager of your choice.

7. Extract this into a folder called Kali on the root of your Sdcard (there should be tow files kali.img and kali.img.md5)

8. You are now ready to boot Kali, do this by using the Launch menu item.

9. You can set settings like screen size in the launch menu. Now the installation process takes place.


10. After a minute or two you should get the message root@localhost:/# , if you get this Kali is running.

11. Now open VNC Viewer app we have downloaded.

12. Set the IP Address to localhost and port number to 5900 and enter the password debian, then press connect and the GUI will render.


Congrats! You have successfully installed Kali Linux on your Android device. Now you can follow the general installation process to install it on hard drive.

Disclaimer: The above process "Installing and Running Kali Linux on Android" is meant for people who are aware of what they are doing. Because Installing Kali Linux on Android is not a small process that every noob can perform. It needs some high knowledge about Android.

Tuesday, 17 February 2015

Beginners Guide: Making the first Android Application Project

Every time I show my newly developed Android application in my college, the first question my friends ask and demand for an answer is 'how exactly should we make an Android application?' and 'where should we start from?'. So for the people having the same curiosity and interest for Android Apps, I have decided to spend some time writing a short tutorial guiding every one of them to become future Android developers. Before reading this, please note that I assume everyone who visited this page to create their first Android app, have a minimum knowledge about Java SE, the main programming language you will be dealing with, and XML to create the User Interface for you application.

Requirements to Make an Android Application:

  • Java JDK (Java Development Kit), the versions change from time to time, download it from here.
  • Android ADT Bundle, which includes Android SDK(manager) and Eclipse (the console where you will be creating apps). Download it from here.
Though Google recommends Android Studio, most of the developers use Eclipse. Download the above softwares and install them. Android ADT Bundle doesn't require any installation. Just download the zip file and extract it. When you are done, let's proceed.

Note: You can now develop Android apps on-the-go on your Android phone or tablet using the app AIDE. It works same as Eclipse. Apps developed using AIDE can be exported to Eclipse. Thanks a lot for the developers - original thread here.

Getting things ready:

When you open Eclipse for the first time you will be asked to select the location to your workspace, where all your developed apps will be stored in the future. Just create a folder in your desired location and link to it.

Creating the Android App:

So because this is your first Android application, all your app does is simply display a text on the center on screen.

Before making the app, you will need to know some terms related to Android development.

  • Activity - Activity is one what you see on your Android device's screen when the app is running. It is your app's user interface which includes text widgets, button widgets and more.
  • Class - Every Activity(XML file) will have a Java .class file running behind it.
  • Android Manifest - 'AndroidManifest.xml' is the heart of the application. It includes all the Java .class files used for running the application, app theme, and the sdk level used to create the app.

If you are getting confused, just read and ignore them. You will get to know them later by yourself. All you need to remember is "User Interface is managed by .xml files and programming is managed by .class files".

When you are ready with Eclipse, follow the below steps to create your first application.
  1. Click File --> New --> Android Application Project.
  2. Enter the Application name as anything you like. I'm entering MyFirstApplication.
  3. Click Next three times and now select 'Blank Activity' (We'll talk about this later).
  4. Leave the Activity name as 'MainActivity' and click finish. This creates two files. A .Class file named 'MainAcitivity.java' and a .Xml file named 'activity_main.xml'
The activity_main.xml file has the code that makes the UI of your Android application. The Xml file is referred as layout file, which by default is located at res/layout/xml file here.


First of all, remove the code in activity_main.xml and paste the below code.
 <LinearLayout xmlns:android="http://schemas.android.com/apk/res/android"  
   xmlns:tools="http://schemas.android.com/tools"  
   android:layout_width="match_parent"  
   android:layout_height="match_parent"  
   android:orientation="vertical"  
   android:gravity="center">  
   <TextView  
     android:layout_width="wrap_content"  
     android:layout_height="wrap_content"  
     android:text="Hello world" />  
 </LinearLayout>  
  
Every layout file will have a type of layout which surrounds all the widgets. LinearLayout is what all the beginners start with. The next thing you need to know is layout_width and layout_height. These properties specify the dimensions of layout. The Orientation property specifies the order of widgets present inside the LinearLayout. The Gravity property specifies the location of child widgets inside the layout.

Inside the LinearLayout we have a 'TextView' widget that simply displays the desired text on the screen. The 'text' property specifies the text that needs to be displayed.

We are done with UI, now let's look at code which handles the xml file. Remove the code inside the MainActivity and paste the below code.     
 package com.example.myfirstapplication;  
   
 import android.app.Activity;  
   
 public class MainActivity extends Activity {  
   
   @Override  
   protected void onCreate(Bundle savedInstanceState) {  
     super.onCreate(savedInstanceState);  
     setContentView(R.layout.activity_main);  
   }  
   
 }  
   
The above code has a method onCreate, which runs the first time when the activity is created. You need not know about the arguments now. Next the UI required for this code is set using the method setContentView(R.layout.layout_name); This code is enough for your app to display the required text on the screen. Now its time to test your code.

Your app can be tested in Android virtual device but I recommend connecting a real device to pc and debug the app. To test your app, you need to enable 'USB Debugging' on your device. Usually this option is found in 'Developer Settings'. Enable it and connect your device using USB cable.

Now click 'Run --> Run' or press 'Ctrl + F11', you device should be automatically detected and listed. Your app will be automatically installed and opened in your device.

Congrats! you have made your first Android application. Go play with the code and see the changes in the application. These are basic steps to make the Android application. There are lot of topics to know in Android development. All the information you need can be found at developer.android.com and your doubts can be clarified at Stackoverflow.com.

Friday, 13 February 2015

How To Break Windows 8.1, 8, 7, Vista and Xp Administrator Password Using Kali Linux Live Boot

break windows passwords kali linux

Sometimes you may have to break windows pc password for any purpose. There are many softwares out there that can do it and the most known one is the OphCrack, which uses rainbow tables to break windows passwords. In this tutorial we are going to use Kali Linux live CD or USB to break the admin password. Using this tutorial you can break both guest and Admin password. Now lets look at the requirements. If you already have a bootable Kali Linux medium you can skip to breaking(cracking) process.

Requirements:

  • An Empty CD or USB drive (2GB would be fine).
  • Kali Linux ISO. Download it from here (32bit and 64bit, both will work).
  • Win32 Disk Imager to flash the ISO to CD or USB. Download it from here.
  • Access to some other PC to make Kali Linux CD.

Creating Kali Linux Live Boot CD or USB:

When you have got all the required things, follow the below steps.
  • Download the Win32 Disk Imager and open it.
    break windows passwords kali linux
  • Insert the empty CD or plug in your pen drive to USB port. In this tutorial i am going to use USB drive.
  • In Win32 Disk Imager select the drive letter of your inserted USB drive.
  • Now specify the location of the Kali Linux iso and then click on write.
    break windows passwords kali linux break windows passwords kali linux
  • Wait for the flashing process to complete and when done, remove the USB from the pc.
Now we have a bootable USB drive. Let's start the hacking process.

The Breaking Process:

When you are ready, follow the below steps one by one to break password.
  • Plug in the Kali Linux Live USB to any of the USB ports and switch on the pc.
  • Enter the BIOS Settings and set the first boot device as USB hard drive, save the settings and restart the pc.
  • Now you see a Kali Linux welcome screen with a list of options.
  • Select the 3rd option which says Live (forensic mode). Wait for the booting process to complete.
  • Once you are on desktop click terminal or press Ctrl + Alt + t to open terminal.
  • In terminal window press the following commands (just type the bold letters) one by one carefully.(follow screenshots)


cd /

cd media/  
 --Displays the list of local drives, you need to find out which one has windows installed on it--

cd hard-drive-name/  
--Replace hard-drive-name with the name of your local drive having windows in it--

cd Windows/System32/config/


ls -l SAM*


chntpw -l SAM


chntpw -u account-name SAM  
--Replace account-name with the name of windows account you want to hack, if you going to hack Admin account just type Administrator--
Now enter 1 to remove Administrator account password. Again enter below command.

chntpw -u account-name SAM

Now enter 4 to unlock Administrator account.

You're done! You have just hacked ADMIN password. Now turn off the Kali Linux. Remove the USB drive and restart the pc.


Also see:
When windows boots up you can see the administrator account, just click it and you will be logged in! Happy Hacking!

Screenshots:(click to enlarge)

break windows 8.1,8,7 admin passwords kali linux

break windows 8.1,8,7,vista,xp administrator passwords kali linux

break windows admin passwords kali linux


break windows admin passwords kali linux


Disclaimer: Breaking passwords without Administrator permissions is illegal. Lets Hack Something and its authors claims no responsibility for any cyber malpractices. This tutorial is for educational purpose only.

Sunday, 25 January 2015

Facebook Hacking Tools: Hack Facebook Accounts Using Android Phone

hack facebook using android phone

There could be many reasons for hacking someone's Facebook account and it is not so simple as we speak. One should know the fact that there are no direct softwares that can hack Facebook account simply by entering the victim's user id. But it is possible with some methods those really work, out of which phishing, key logging, packet sniffing are most popular and widely used ones. Today, in this tutorial you are going to learn how to perform packet sniffing attack to hack Facebook account using your Android smartphone.

What exactly is packet sniffing?

hack facebook using android

Lets make this simple with an example. Consider two persons A and B using the same public WiFi network. The information sent and received between the device and WiFi hot-spot is done in the form of packets. These packets are not secured and can be access by any other device connected to same network. If Person A is using Facebook, his log-in credentials are sent in the form of packets which Person B can access and read them. In fact, Person B can modify them. Not only log-in credentials, everything you use within your browser can be seen and modified by anyone else as long as you are connected to that network.

So, Why Android Phone?

Earlier, when this process is first developed the only way to do packet sniffing is using PC or laptop running on Windows or Linux operating system. But now it can be done using any Android phone with root access (we shall talk about this later). The main reason for using Android phone is simplicity. It works same as PC, in terms of speed and accuracy. It has same number of tools as PC. And when you are in crowd, you can simply take out your mobile and do some hacking anonymously.

Does the Android Phone require any particular specs?

No particular specifications are needed for your Android device to do this. But your device needs to be rooted. For a brief explanation of what rooting is, read the tutorial on "How to Root Any Android Device".

Now, what is the main process?

Let's end the intro here. Now lets talk about the main procedure of packet sniffing. This tutorial assumes that you have an Android device, of course rooted. Now all you have to do is, install one of the Applications listed below, connect to a public WiFi network and start hacking people. Usually there are many apps out there that can perform packet sniffing. I have used all such apps and found these three to be working perfect even during poor network signal.


1. DroidSheep [Requires Root]

DroidSheep is one of the best app to hack Facebook and other website accounts. DroidSheep cannot get username and password credentials but can grab live sessions of users and show them on your device. Live sessions means, according to our example, if Person B is using Facebook and Gmail in two tabs of his browser, Person A gets exactly the same tabs in his device further which he can modify or access any required content from them. Using DroidSheep you can hack almost any website accounts based on the victim's usage. As DroidSheep is being used for illegal purposes it's download link has been removed from official DroidSheep website. Search Google and you can find it.


2. Faceniff [Requires Root]

Faceniff is another tiny application that is used to hack Facebook accounts over WiFi now and then. Unlike DroidSheep, Faceniff is solely created to hack only Facebook accounts. Using Faceniff you can get user id and passwords of the people using Facebook in the same WiFi network.

3. Dsploit [Requires Root] - Works Best

According to me, Dsploit is the best, in terms of penetration testing attacks. Dsploit has a number of pen testing attacks like Router PWN, Port Scanner, Inspector, Vulnerability Finder, MITM attacks and many more. We are going to use MITM attacks for our purpose. MITM stands for Man In The Middle attacks which include Password Sniffer, Session Hijacker, Script Injector out of which we are going to use Password Sniffer to get account passwords over WiFi. If you are curious about this app, explore it and you will find lots of tools in it.


Download Working & Updated version of Dsploit here: DOWNLOAD LINK.

Disclaimer: Hacking Facebook is an illegal activity, use this tutorial for educational purpose only and we claim no responsibility.

Bottom Lines: Hacking Facebook account using Android phone is a bit easier process when compared to PC and hacking over WiFi is the only process to do it. If you know more apps of this kind, feel free to comment below. Happy Hacking!