Installing Kali Linux on Android gives us access to wide range of possibilities. In face, anything we do on pc running Kali Linux can be done remotely / portably on Android. Remember, not all devices are capable of running Kali Linux. The particular device should meet some requirements which I'll be mentioning later in this tutorial. Keep in mind that, after using this guide, we're not going to have Kali Linux as our primary Operating System, but actually it runs virtually in virtual machine, which is same as having secondary OS in VM VirtualBox.
Why Android Device?
The reason one likes to have Kali Linux on their Android devices is portability. Not all can afford laptops or pcs capable of running more than operating system. The other reason is some pcs may not have enough space on hard drive. These are the two main reasons for choosing Android as platform.
Does the Android device needs ROOT?
The answer is yes. This is because the process you are going to perform messes with system files which require super user permissions. Bear in mind that rooting voids phone warranty.
So, What requirements should the device have?
- The device should have at least 512 MB of Ram. The more Ram, the faster the performance.
- 4-5 GB of Internal Memory.
- Android 4.0 and above.
Prerequisites:
- Android Device
- Complete Linux Installer (Requires ROOT). Download full version from here.
- Android VNCViewer. Download full version from here.
- Android Terminal App. Download full version from here.
Also Read:
The main process starts here:
1. Download Complete Linux Installer and install the app.
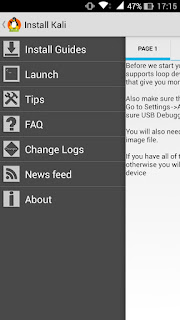
2. Open the application (Allow Super User Permission) and click Install Guides.
3. In the list of Linux Operating systems that can be installed, select Kali Linux.
4. Now scroll to page 2 and click Download Image.
5. In the mean while, when the download is in progress, install the remaining applications
VNCViewer and Terminal.
6. Once the download has finished you will now need to extract the zip folder using file manager of your choice.
7. Extract this into a folder called Kali on the root of your Sdcard (there should be tow files kali.img and kali.img.md5)
8. You are now ready to boot Kali, do this by using the Launch menu item.
9. You can set settings like screen size in the launch menu. Now the installation process takes place.
10. After a minute or two you should get the message root@localhost:/# , if you get this Kali is running.
11. Now open VNC Viewer app we have downloaded.
12. Set the IP Address to localhost and port number to 5900 and enter the password debian, then press connect and the GUI will render.
Congrats! You have successfully installed Kali Linux on your Android device. Now you can follow the general installation process to install it on hard drive.


